Game Time

Last night, I went to a Timberwolves vs. Clippers game at the Target Center. Although I originally wasn’t planning to attend, my appreciation for basketball combined with the availability of a free ticket left me no option but to head to the game. One warning if you’re going to a T-wolves game at the Target Center: they take their security really seriously! I was almost forced to check my draw-string shoe bag, and I wasn’t allowed to bring my Nalgene into the arena – even if I emptied it of water! To say this exchange with the security guard left me disgruntled would be an understatement. Luckily, my indignation passed soon enough.

Unfortunately, turns out that you get what you pay for when it comes to seats. This is what our $8 (or free, in my case) tickets got us:

photo (23)

Are those even people down there?! The arena was far from full though, and we used halftime as an opportunity for some sneaky maneuvering that brought us here:

photo (24)

Not bad, eh? My enjoyment of the game increased significantly once we were in the lower level near the court. In the balcony, there were very few people, no crowd excitement to speak of, and I could see the jumbotron screen better than the court. In contrast, the lower level was big time fun with lots of riled fans and a clear view of all the action. The game was close overall – especially for the last few minutes – but the T-Wolves ended up falling behind at the end and losing.

After the game is when the real adventure began as my life became a scene from this:

Dude, Where's My Car? (2000) Poster
[image source]

or this:


[image source]

Yep. No one in my group remembered to notice where we left the car in the parking garage. After wandering through the whole 4th floor, we went to the 5th, to return to the 4th…you get the idea. And did I mention that it was freezing?! After what felt like years (although I was assured it had been no more than 20 minutes), we spotted the most beautiful sight on earth:

photo (25)
HALLELUJAH! Take away messages of the evening: 1) Buy good game seats or stay at home, 2) don’t lose your car.

Party Dinner

It’s simple arithmetic really:

good friends + good food = one lovely evening

Originally, there were two of us. Then three. Then four. And four’s a party. So, behold, what I now consider to be the best party dinner…

photo (18)

MAKE YOUR OWN SPRING ROLLS!

Why, you ask, are spring rolls the best party dinner? Let me count the ways:

1. There are enough small tasks for everyone to be involved with the prep.
2. You get to assemble your meal gathered around the table together.
3. It’s healthy!
4. It’s fun!
5. It’s easy!
6. You are guaranteed to laugh at least once when someone accidentally gets the wrapper they are preparing ripped/mangled/stuck to itself/stuck to something else.

The only things you need for this fabulous, festive feast are:

– a bunch of your favorite vegetables chopped into strips (we used carrots, cucumbers, avocado, and green onions)
– protein of your choice (we used chicken)
– rice noodles (optional, if you want to bulk up your rolls)
– fresh herbs of your choosing (we used basil)
– spring roll wraps
– dipping sauce, if desired

First, cut all the veggies into strips:

photo (15)

Cook the chicken in a skillet. Flavor with soy sauce, if desired.

photo (16)

Making your own peanut sauce is really easy, so I would recommend giving it a try! This is a combo of soy sauce, fresh ginger, chunky peanut butter, and a little hot water (tip: it’s very important that the water be HOT!).

photo (17)

You will need to stir vigorously to combine the sauce, so don’t feel discouraged if it doesn’t look right at first.

Cook the rice noodles, if using, on the stove:

photo (22)

Once all of the ingredients are ready, assemble everything on the table and prepare some hot water in a skillet for prepping the wrappers:

photo (18)

The spring roll wrappers will be something like hard, thin, crackers to start with. You need to dip them in the hot water to soften. Once softened, the wrappers will also be sticky so you can fold up your roll after stuffing. You will probably master this step on the second try. 🙂

softened wrapper

softened wrapper

Finally, the best part, add all the ingredients you want, roll up, and enjoy!

photo (20)

Yes, definitely a party. 🙂

Turkey Tacos

As promised, here is the turkey tacos recipe to accompany yesterday’s black bean salad. This recipe is fast, simple, and delicious. In fact, I can’t think of any reason why you shouldn’t make it. Unless you’re a vegetarian…but then you could make it with soy crumbles. So, yep, absolutely no reason why everyone shouldn’t make it. (full recipe below)

All you need are these ingredients:

photo(135)

Plus ground turkey. Raw meat, as it turns out, is not photogenic.

Cook ground turkey with taco seasoning and 1/4 cup water in a skillet at medium-high heat:

photo(133)

Chop tomatoes and add to the turkey once the meat has browned:

photo(134) photo(132)

Chop cilantro and add to skillet:

photo(127) photo(131)

Serve in tacos and enjoy!

Turkey Tacos
Serves 4
Ingredients
- 1.25 lbs extra lean ground turkey
- 1/4 cup water
- 1 taco seasoning packet
- 3 small tomatoes
- 1/4 cup cilantro
Method
Cook turkey, water, and seasoning in a skillet over medium-high heat 
until meat has browned.
Add chopped tomatoes and chopped cilantro.
Mix and cook until vegetables are warmed through and the meat is 
no longer pink.

Meal example:

photo(125)

Last nights dinner was turkey tacos plus black bean salad, 1/2 avocado, and a few scoops salsa.

Inner Artist and Black Bean Salad

Tonight was the first meeting of my Minneapolis Community Ed. watercolor class. I took this same class in the fall and loved it. The teacher is fun, easy going, and supportive. Also, since I’ve accepted the fact that I am unlikely to paint on my own, having a class on my schedule is the only way to ensure that I will release my inner artist. This term’s painting focus is ‘birds.’ I worked on a swan and played around with a setting-sun landscape.

photo(124)

The class has only 8 people, and it was fun to walk around and see some of their work as well.

In addition to learning, my day involved some cooking. I made a black bean salad to pair with turkey tacos.

For the black bean salad, drain and rinse one LARGE can of beans (I used one 25oz. can, but two 15oz. cans would work just fine):

photo(130)

Chop 3 large sweet peppers:

photo(129)  photo(128)

Chop 1/4 cup cilantro:

photo(127)

Mix it all together and…

photo(126)

…voila! Easy peasy. For dinner, I had turkey tacos with black bean salad and a half avocado:

photo(125)

Turkey tacos recipe will be posted tomorrow, so check back soon!

Treadmill Run and DELISH Breakfast

Remember the snow yesterday? This is what it looked like this morning:

photo (13)

I snapped that pick while heading to the gym for some NROLFW Stage 3. The area of focus for today’s workout was definitely the back, and I felt a little sore after. I also did a quick treadmill run. I did a variation of Fitness NYC’s 3s and 5s treadmill challenge. Since I’m trying not to run more than 3 miles at a time until my knee/IT band issue is fixed, I had to modify the workout a bit. Here is what I did:

set treadmill at 1% incline
time (mins)          speed
0-3                          6.0
3-6                          6.5
6-7                          7.5
7-8                          6.0
8-9                          7.5
9-12                        6.7
12-15                      6.1
15-18                      6.7
18-19                      7.5
19-20                     6.0
20-21                     7.5
21-22                     6.0
22-23                     7.5
23-26                     7.0
26-27                     6.5
27-28                     7.0
28-29                      6.5
29-30                     6.0

The run ended up being 3.3 miles. Whoops. 🙂

After the gym, I had THE MOST DELICIOUS BREAKFAST EVER. You absolutely must make these two recipes immediately:

1. caramelized bananas
2. couscous breakfast bake

Then you must combine them (and smear with nut butter, obviously) and enjoy this:

photo (14)

Soooo good.

Couscous Breakfast Bake

My original plan was to make some sort of baked oatmeal that I would use for breakfasts throughout the week. Unfortunately, that plan was foiled by the fact that I only have about a half cup of oatmeal in my cupboard.

Wanted: a grain that I own in abundance. Found: couscous. Couscous for breakfast, you say? It can be done! (full recipe below)

It’s simple really. All you need are these basic ingredients…

photo(121) photo(120) photo(119) photo(118)

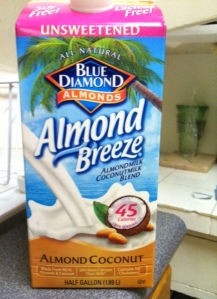
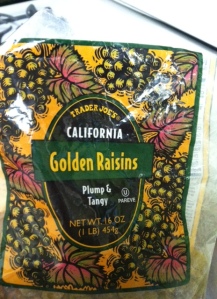
milk (or something like it) + allspice + cinnamon + raisins (or dried fruit of choice) + couscous

Mix it all together with the appropriate quantities and pour into sprayed baking dish:

photo(122)

TIP: make sure to spray the dish the first time instead of pouring it in, realizing you forgot to spray, taking it out, cleaning the dish, drying the dish, actually spraying the dish, and repouring the mixture. Not that I did that or anything. 😉

Bake it at 450° for 25-30 minutes until browned:

photo(123)

looks like breakfast!

This combined with caramelized bananas and nut butter, #SeeYouEveryMorningThisWeek

Couscous Breakfast Bakeserves 4
Ingredients
- 1 cup couscous
- heaping 1/4 cup raisins or dried fruit of choice
- 2 teaspoons cinnamon
- 1 teaspoon allspice
- 1 and 1/4 cup milk substitute of choice (or milk...if you're into that)
Method
Combine all ingredients in a bowl and mix to combine. 
Pour into a greased baking dish and bake for 
25-30 minutes at 450°

Yep. It’s that easy. 🙂

Snow + Warm Bananas

The weather here in Minneapolis took a dramatic turn towards ‘winter wonderland’ today. This was the view at 2:00pm after only about 20 minutes of snow:

photo(115)

…and one hour later it looked like this:

photo(114)

There is so much snow now! Maybe this will facilitate some cross-country skiing next weekend. 🙂

Obviously, a cold snowy day calls for something warm and delicious. Given how much I adore bananas, they were the ingredient of choice. I mixed two sliced bananas with 1 tablespoon of melted coconut oil:

photo(113)

Arranged on a greased baking tray:

photo(116)

Cooked in the oven at 375° for 30 minutes.

photo(117)

mmmm, look at that caramelization! I will be including this in my breakfast tomorrow for sure.

Small Surprises

Don’t you love it when you walk into the bathroom and find something like this on the mirror?

photo(110)

Seriously made my day.

all smiles

all smiles

This random act of kindness must have given me some positive vibes, because afterwards I put up an impressive showing at the pool table (if I say so myself).

photo(109)

Here is Noah shooting his first shot of the game:

photo(107)

And his second:

photo(106)

Notice a difference in the playing field? Why yes, that is because I knocked in five balls IN A ROW. That has literally never happened to me before. Never.

And what’s a game of pool without a couple of hot drinks to enjoy it with?

ahhh

mocha for Noah, green tea for me

NROLFW: Stage 1

As described in the NROLFW Overview (suggested prior reading), The New Rules of Weight Lifting for Women is a 6-month strengthening plan. The plan includes 7 Stages, with two Workouts (A and B) for each Stage.

The New Rules of Lifting for Women

Stage 1 is the longest stage (6 weeks), and it is intended to give you a foundation to build on for the rest of the program. Stage 1 workouts and my improvements are as follows:

Stage 1, Workout A (repeated 8 times)

Squats
Workout 1: 20 pounds + bar
Workout 8: 60 pounds + bar

Push-Ups
This exercise involved no increases in weight, but I was supposed to work on my form, getting lower to the ground, and keeping my body straighter. I definitely felt as though I improved in these regards.

Seated Rows
Workout 1: 45 pounds
Workout 8: 75 pounds

Step-Ups
Workout 1: 15 pounds in each hand
Workout 8: 25 pounds in each hand

Prone Jackknife
Again, this exercise was about form and not increased weight. I did Workout 1 with 10 reps and finished Workout 8 doing 15 reps with much better form.

Stage 1, Workout B (repeated 8 times)

Deadlift
Workout 1: 15 pounds + bar
Workout 8: 30 pounds + bar

Dumbbell Shoulder Press
Workout 1: 20 pounds
Workout 8: 27.5 pounds

Wide-grip Lat Pulldown
Workout 1: 60 pounds
Workout 8: 85 pounds

Lunge
Workout 1: 20 pounds in each hand
Workout 8: 27.5 pounds in each hand

Swiss-ball Crunch
This exercise did not involve weight but progressively difficult variations. I started Workout 1 doing 15 reps of the easiest variation and ended Workout 8 doing 20 reps of the most difficult one.

Overall, I definitely felt that I became stronger during Stage 1. I also became A LOT more comfortable in the weight room and overcame some self-consciousness when using equipment that I don’t generally see women around (barbells, squat racks, weights over 20 pounds…for example). The 6-week Stage did feel a little long, and I was feeling very ready to move onto Stage 2. Onward and upward!

New Rules of Weight Lifting for Women: Overview

I’ve mentioned my weight lifting workouts on a few occasions, and since I know everyone must be dying to get the full scoop…here goes!

I learned about the New Rules of Weight Lifting for Women (NROLFW) from Meghann over at Meals and Miles.

The New Rules of Lifting for Women

You can read Meghann’s final review of the program here.

Basics of the Program
NROLFW is a 6-month strengthening plan designed specifically for women. It is highly structured with specific workouts, sets, and reps that you are supposed to complete 3 times a week. There are seven different Stages of the plan, and each Stage lasts 3-6 weeks and includes two different Workouts (A and B) that are alternated throughout the Stage. It sounds a little confusing, but all of the details for every Stage and Workout are clearly outlined and organized within the book. Example:

photo(105)

Stage 2, Workout A

Then, there are training log sheets that you can print out online (or copy from the book if you prefer) where you track the weight used for each set and workout within the stage.

photo(104)

you can’t see the details, but here’s the general idea

The plan is good for me because I definitely need big time structure in a lifting plan if I’m going to follow it. When I’m on my own, I’ll lift weights here and there, switching it up based on whatever I feel like that day. Unfortunately, that approach doesn’t lead to actually getting stronger. Education on how to ‘actually get stronger’ is, in fact, a primary topic of the NROLFW book. Much more than just a listing of workout plans, the first 120 pages of the book are completely devoted to teaching the reader about why weight lifting is important and how to do it in a way that will actually make your muscles stronger. (spoiler: to get stronger you need to continuously be increasing the weight you use. Increasing the number of reps won’t do anything for increased strength, only endurance)

Nutritional Stance
The book also has a lot of information about nutrition and the importance of protein in our diets (both in general and particularly for someone who is trying to gain muscle). I’ve read more than my fair share of nutrition and diet plans, and they generally seem to all follow the same outline: high emphasis on counting calories and making that count a low number, low emphasis on where those calories come from and proper balance of nutrients. Most diet plans I have read about in either books or magazines suggest somewhere in the range of 1,200-1,500 calories a day, sometimes adding in extra ‘reward’ calories based on exercise. I expected something similar from this book.

Thankfully, I was pleasantly surprised! The nutrition and food advice given by NROLFW is a refreshing departure from the standard calorie restriction diets promoted to women in essentially every other ‘nutrition’ plan I have read. The section focusing on food is titled ‘You Aren’t What You Don’t Eat,’ and the author, Lou Schuler, goes on to describe typical diet advice as a fatally flawed “war against food.” One particularly poignant argument that Schuler makes has to do with the number of calories women are generally encouraged to eat on typical diet plans.

In a sub-section titled, ‘Calorie Restriction is the Worst Idea Ever,’ Schuler describes an organization called the Calorie Restriction Society. The organization believes that people can live longer, healthier, and better lives by limiting the amount of food they consume. Still, their website has a ‘risk’ section warning against some of the serious dangers associated with cutting calories. Dangers include: depression, loss of strength/muscle mass, deteriorating bone mass, hormonal disruption, diminished energy, infertility, and hunger (duh.). How many calories does the group encourage people to eat? Numbers starting at about 1,400.

Schuler then compares this practice to the first stage of The Sonoma Diet eating plan (a previous New York Times bestselling book with 4.2/5 stars on Amazon). The Sonoma Diet’s initial stage – as well as the general guidelines of nearly every other diet plan I have read in magazines or books – instructs dieters to eat 1,200-1,400 calories per day. Schuler sums it up too well to paraphrase:

Yes, the maximum calories [allowed] in the first phase of [the] diet is equal to the fewest calories eaten by members of a cult who try to live longer by teetering on the precipice of starvation.

That is seriously messed up.

Moral of the story: I am excited to do this plan because the book offers not only a potentially effective lifting plan but also a positive and healthy perspective on food and fitness.

Read details of each lifting Stage here!

Stage 1 – completed
Stage 2 – completed
Stage 3 – completed
Stage 4 – completed
Stage 5 – completed
Stage 6 – in progress
Stage 7 – coming up